First Sync Tutorial
🧭 Prerequisites
Before you begin syncing, please make sure the following conditions are met:
✅ Your Jira Cloud site has Xray Cloud installed and active
✅ Your target Jira project has the “Test” issue type configured for Xray (not Bug, Story, etc.)
✅ Your GitHub repository has:
A valid
main(or specified) branchThe configured
Test Directory Pathexists and contains test scripts
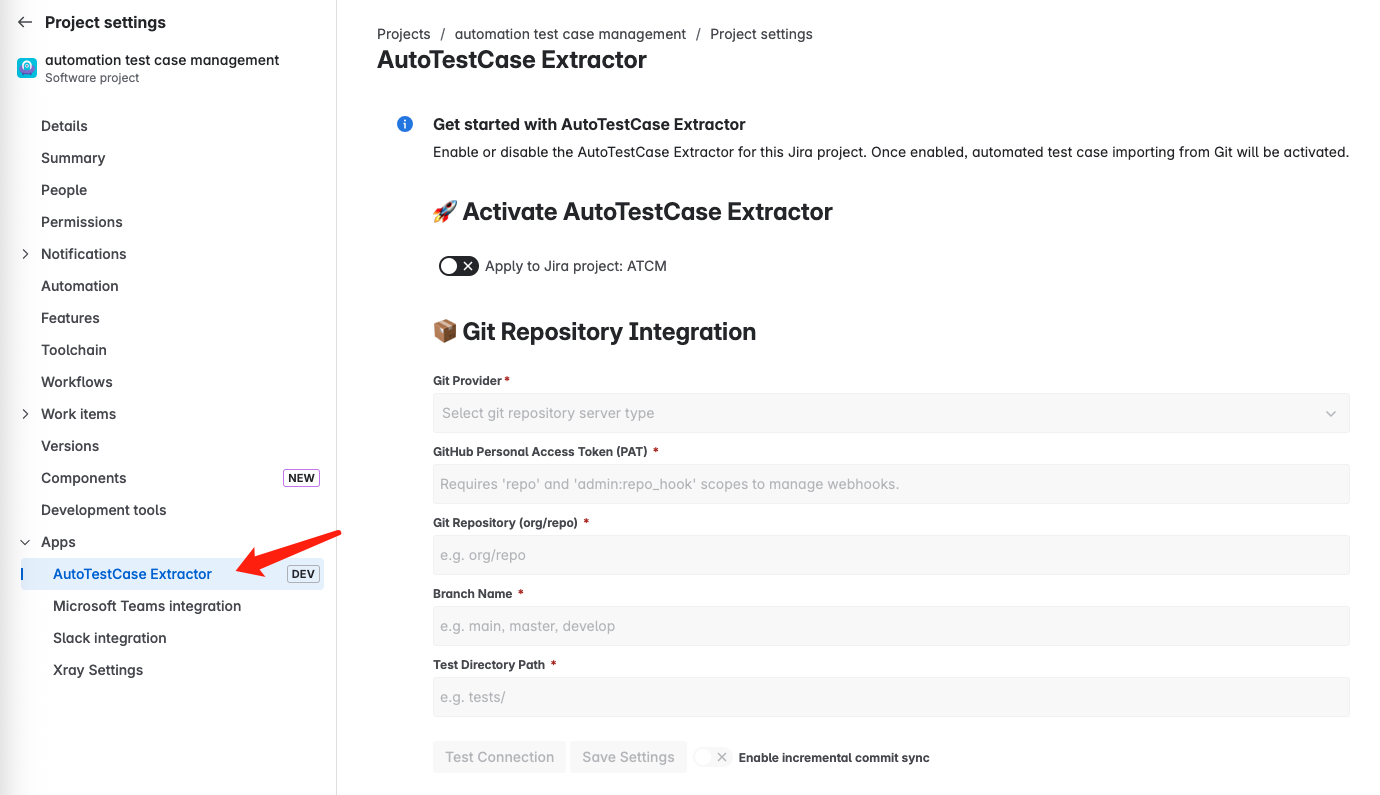
🎯 Access AutoTestCase Extractor in Project Settings
Go to Project Settings > Apps > AutoTestCase Extractor.
🧩 Authorization Setup
1. Connect to GitHub
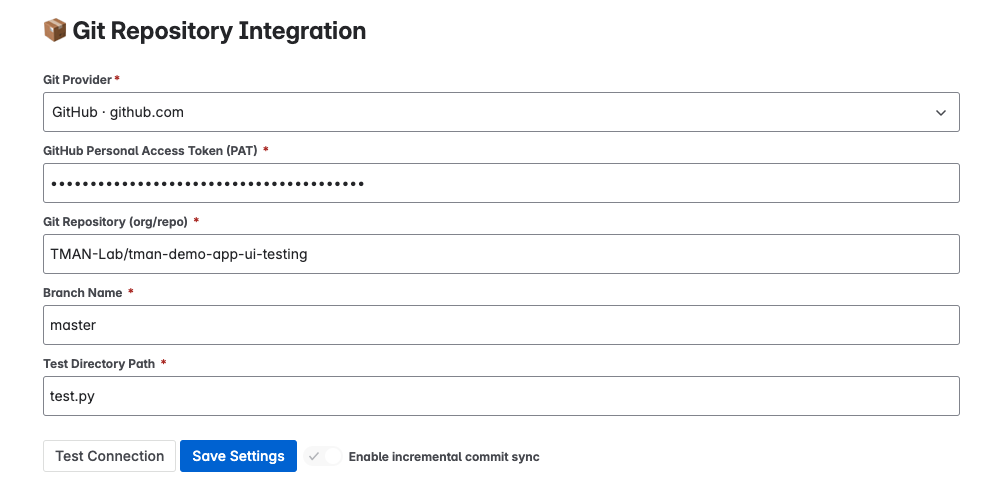
Configure Git Repository.
Enter:
Git Provider (
GitHub - github.com)GitHub Personal Access Token (with
repoandadmin:repo_hookscopes)Ensure the token has sufficient permission (
reposcope (for repository read access)admin:repo_hookscope (for creating webhooks)
Optional: Fine-grained Personal Access Token (Recommanded for more granular control)
If you prefer more granular permission control, you can use a Fine-grained Personal Access Token instead.
🔗 Creating a personal access token (fine-grained)
Please select:
Repository access → Only select repositories
Choose the repositories you want to enable auto-sync.
Permissions → Repository permissions
Contents(Read-only)Metadata(Read-only)Webhooks(Read and write)
Git Repository (e.g.
your-org/your-repo)Branch Name (e.g.
master)Test Directory Path (e.g.
tests/)The specified path must exist in your repository. If it’s incorrect or points to a non-existent file/folder, the sync will silently complete without importing any test cases.
Click Test Connection to check the credential is correct.
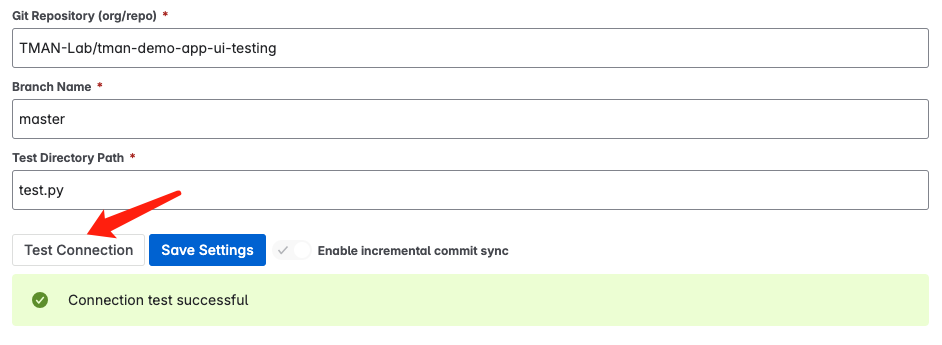
Note: The “Test Connection” only verifies the correctness of your GitHub credentials. It does not validate the test file path or check the repository contents.
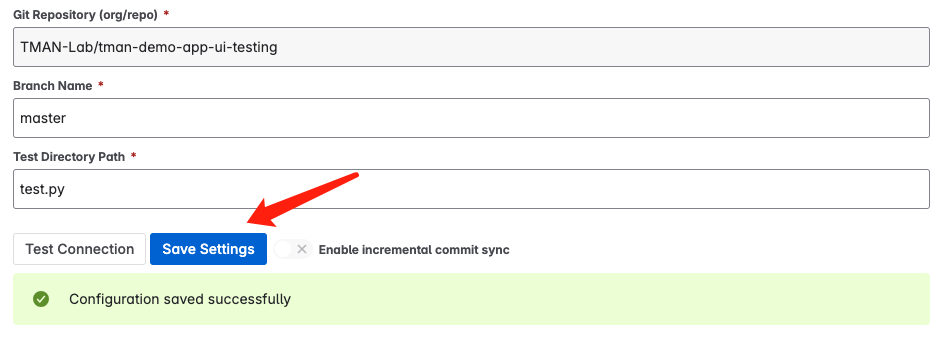
Click Save Settings to complete configurating
You can click Enable incremental sync switch to activate git commit-based sync
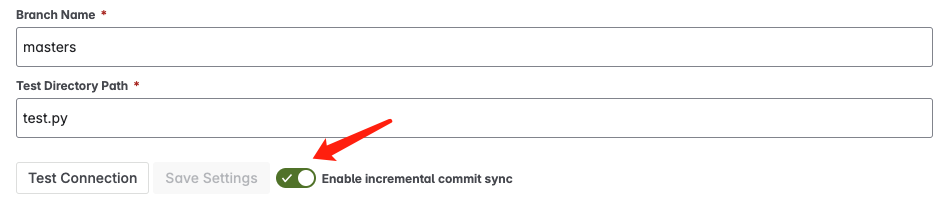
The app will verify access and automatically create a webhook for the target branch.
2. Connect to Xray
Switch to the Test Management System Integration section.
Enter:
Test Management System (
Xray - Test Management for Jira)Xray Work Item Type (e.g.
Test)In most cases, this should be set to
”Test”, unless your Jira admin has customized the issue type mapping in Xray (e.g., renamed it or mapped “Test” to a different Jira issue type).
Xray Client ID and Xray Client Secret from Xray API settings
Select user
AutoTestCase Extractorto generateClient IdandClient Secret
Xray Test Repository Root Path (
/AutoTestCaseSync)All synced test cases will be added into this root path, this value cannot be modified in this version
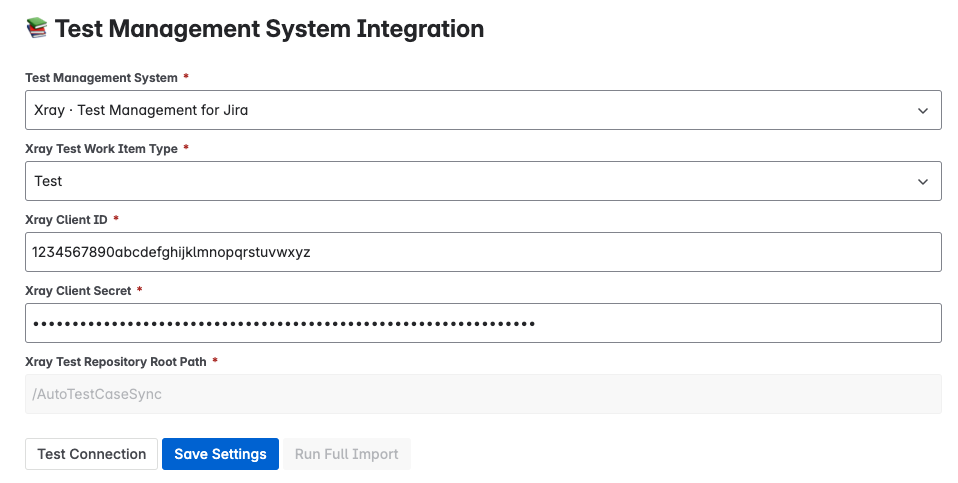
Click Test Connection and Save Settings
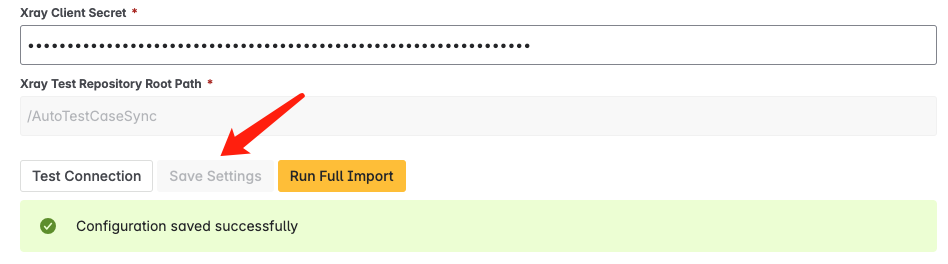
🏎️ Run First Sync
Click Run Full Import to manually trigger case extraction.

The app will start importing test cases from code.
🛠 Common Pitfalls & Misconfigurations
Here are a few things to double-check if the sync is not working:
❌ The GitHub repository does not contain the specified branch
❌ The configured test file path (e.g.,
tests/test_sample.py) does not exist❌ The Xray Test issue type is incorrectly mapped (e.g., to “Bug” instead of “Test”) - this prevents test cases from being created.
❌ The repository is private and credentials are invalid
✅ We plan to improve these with automatic validations in future releases.